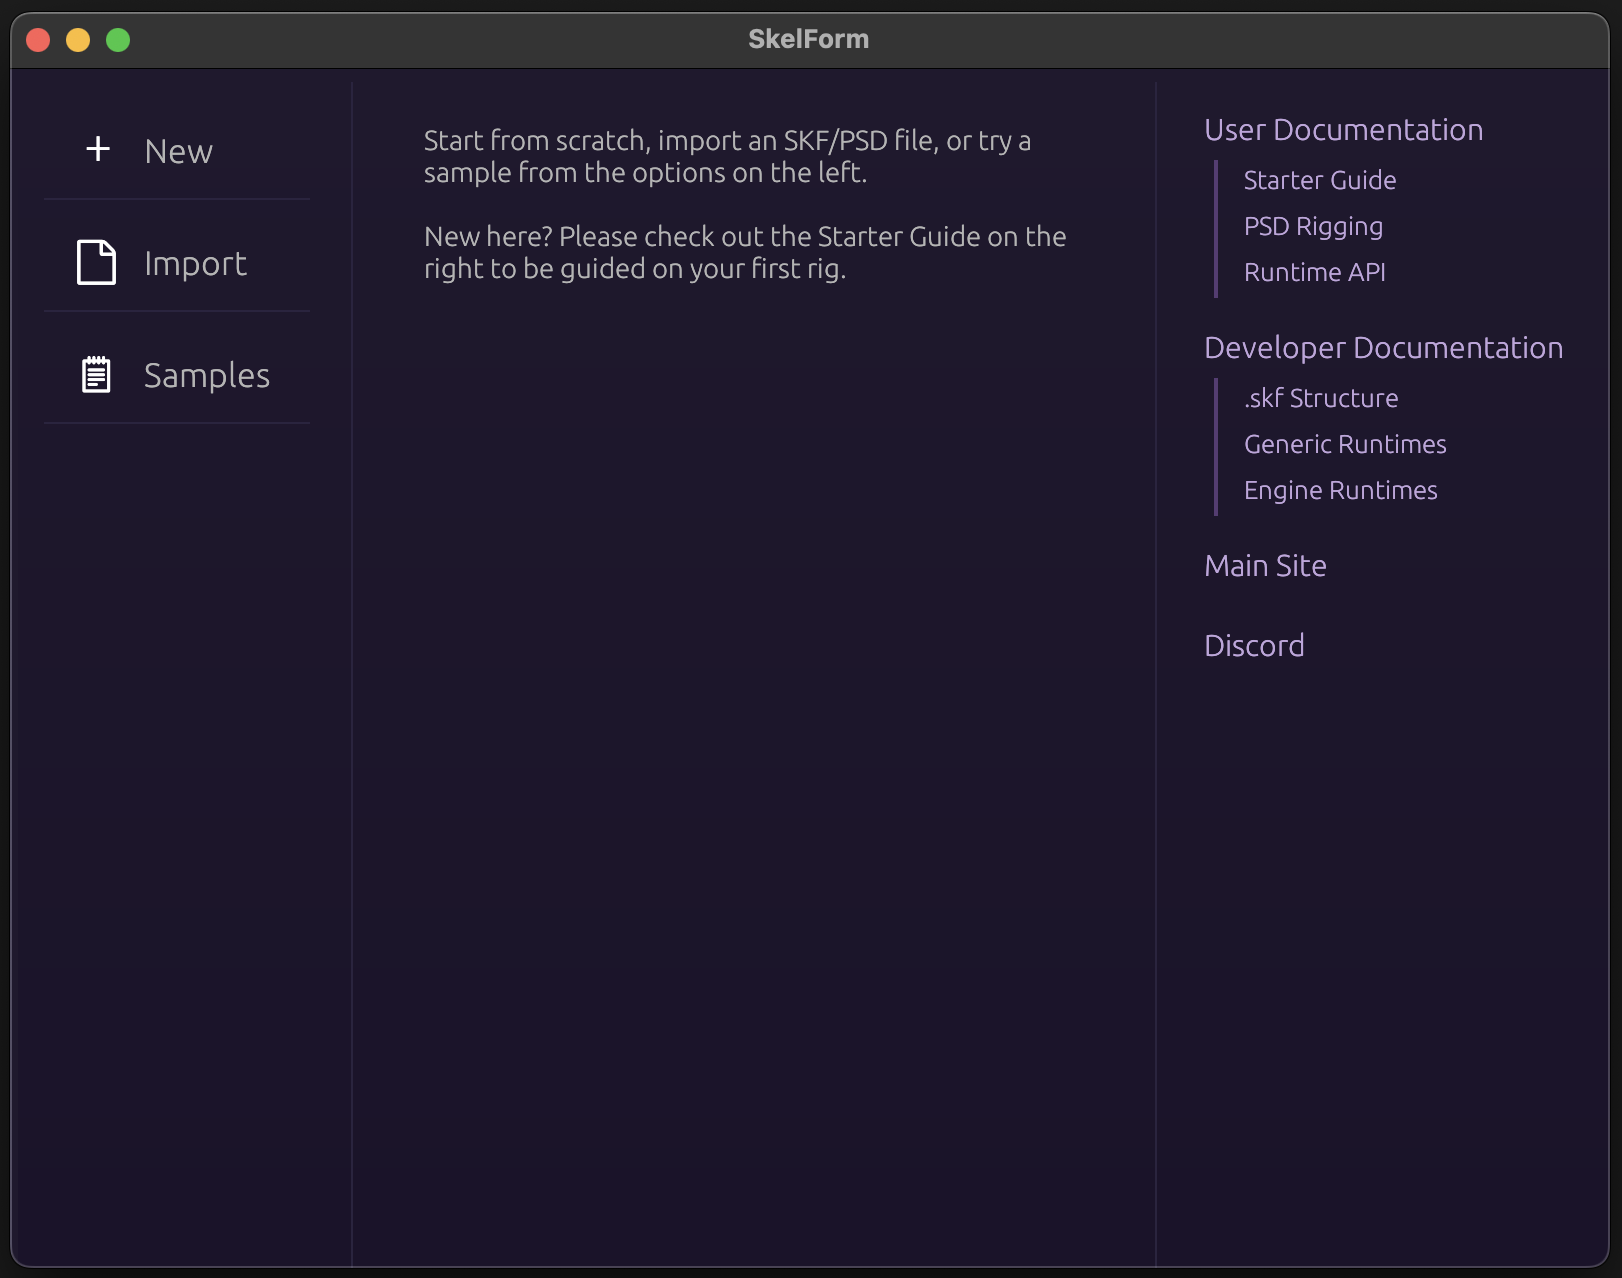
Introduction
SkelForm is a 2D skeletal animator, designed for games. To run in said games, runtimes are provided for select game engines.
SkelForm, and this documentation, are works in progress.
Table of Contents
- Installation - Installing SkelForm
- Starter Guide - Written guide on starting out with SkelForm, from the editor to the game
- PSD Rigging - Guide and references for creating rigs out of PSD files
- Runtime API - Reference for the API provided by official engine runtimes
Before You Download…
…check out the Web version , which does not require downloading!
Otherwise, read on.
Installation
The SkelForm editor can be downloaded from the site.
It’s only prvided as a portable program, and does not have an installer.
Once it’s downloaded, unzip/uncompress the zip file and open the SkelForm binary (SkelForm.exe on Windows).
If you see a screen like this, then all is good!
Let’s get started and go through the basics.
Starter Guide
Welcome, and thank you for using SkelForm!
This starting guide will help you quickly get on your feet with using the editor.
A bonus section is included for using your animations in a game.
Table of Contents
- Basics - Getting comfortable with the editor, and creating your first rig
- Animating - General overview of the keyframe editor and the animation process
- Finale - Exporting your rig, and using it in a game!
- Bonus: Using in a Game - Using your animations in pygame
Basics
For the basics, we will go through a simple rigging process, as well as a little tour around the editor.
Table of Contents
Moving & Zooming the Camera
Hold Ctrl/CMD while dragging the mouse to move the camera.
Zoom in/out with the scroll wheel or -/+ keys. On a touchpad, drag 2 fingers up/down.
Your First Bone
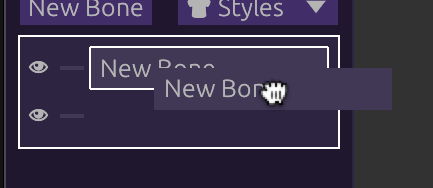
Click the New Bone button on the Armature panel (left side) to create a bone.
The Bone panel (right side) will show the bone’s fields such as position, scale, etc., and can be edited.
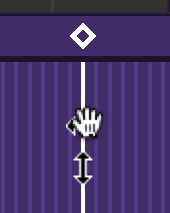
The bone can be edited by dragging the mouse while holding left-click. The field being edited is based on the top-left bar’s selection (Move, Scale, Rotate).
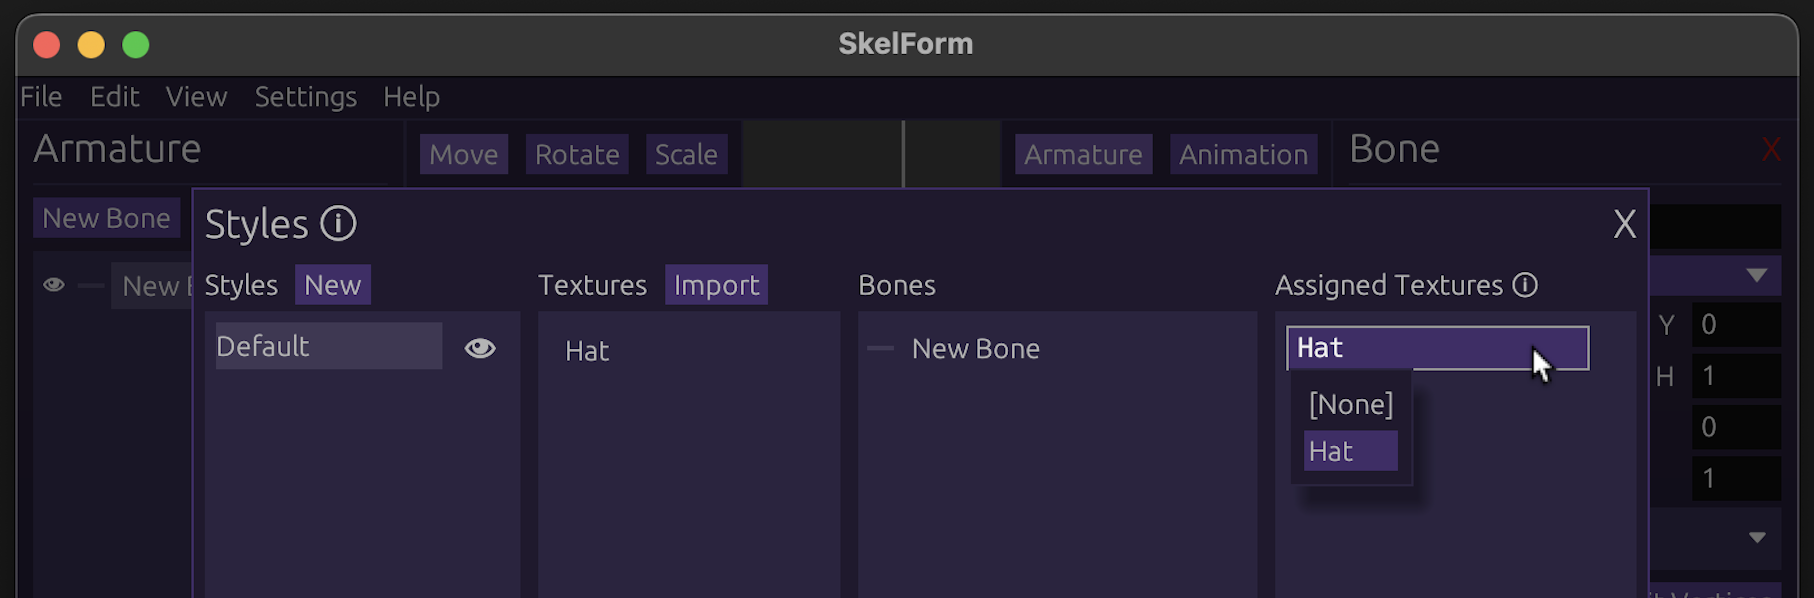
Adding a Texture (and Style)
The bone is invisible right now, and all you see is the green point that represents it’s center.
To give this bone a texture we’ll need a Style, which is a group of textures. Multiple can be made for outfits and skins, but we’ll just use one for now.
To add a Style, click on the Styles dropdown next to New Bone, or in the
bone panel. Click [Setup] within to open up the Styles modal:
From here, click on New Style and give it a name. Click Import next to
Texture when it appears, and select any image to be used.
After importing the image, the Assigned Bones section will show all bones and what texture they’re using (based on name). Since your bone isn’t using any, click on it (or drag the texture to it) to assign it:
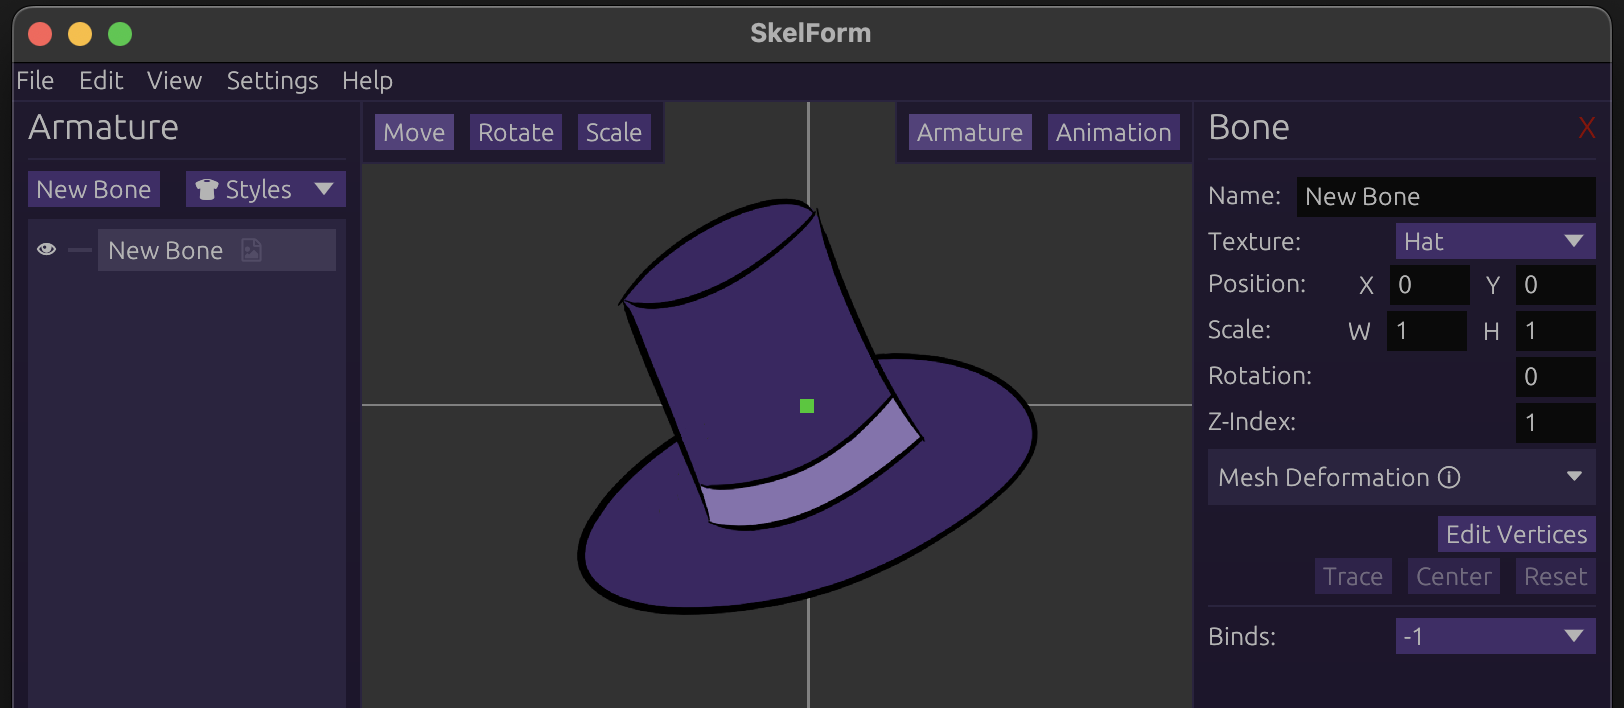
Close the Styles modal, and you should now see your bone with the given texture.
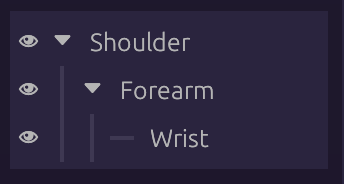
Parent & Child Bones
Bones can be children or parents of one another. This affects how they are transformed, which will be useful for joints and such.
Example:
- shoulder -> forearm -> wrist
- neck -> head
Create another bone, give it a texture (as in the above step), then drag either bone to the other:
Once released, the bone you held will be the child of the other!
Changing the parent in any way will affect the child as well. If both bones are textured, this is easy to see. Play with the parent to see how the child behaves!
Parent-Child Bone Inheritance
Child bones always inherit their parent’s properties.
Example:
- Child position = (2, 2)
- Parent position = (3, 3)
- Final child position = child + parent = (5, 5)
For scale, the field is multiplied by the parent.
Note: The bone panel shows the bone’s own field values. A child’s position in (0, 0) means it’s in the center of the parent, not necessarily the grid.
Pivots & Hinges
Child bones will ‘orbit’ their parent when the parent is rotated. This can be used to set parents as the ‘pivot’ to their children.
Example: A foot is the child of the knee. When the knee rotates, the foot ‘orbits’ and correctly stays in place.
Often you may need to create an invisible bone to act as the pivot of another, textured one.
Conclusion
Play around with bones and textures, and try to create a rig.
Once you are ready, let’s start animating it!
Animating
In the previous section, we went over the basics with bones and how they work.
Right now, they’re static and boring. Let’s change that!
Table of Contents
Opening Animation Editor
On the top right, you will see Armature and Animation. Click the latter, and a panel at the bottom of the screen will appear.
To the left of it, click New to create a new animation. You will be prompted to name it first, though you can press Enter to leave it with the default name.
The animation editor should appear:

Let’s get to animating!
Adding Keyframes
Click on a line anywhere in the animation editor. Edit the bone in any way (moving, scaling, etc), and you should see it appear in the animation editor:

This means that your edit has been recorded!
You will notice that in addition to the keyframe that you clicked, there is one at the very left. This is the initial value of the field that you edited, so the animation knows how to interpolate the field.
Speaking of interpolation…
Playing The Animation
Let’s play the animation, either by pressing the spacebar or clicking the Play button at the bottom of the animation editor.
You should see your bone being animated! This will keep running in a loop until you stop it (spacebar or Stop button).
Editing Keyframes
Keyframes can be individually edited, and the individual fields can even be dragged around. Try dragging either the diamonds at the top of the keyframe editor, or the icons that correspond to their field. The animation will be changed to reflect their places in the timeline.
Clicking a diamond will also ‘select’ the keyframe. The right panel will show extra information about the selected keyframe, along with some options. Play around with them and see how the animation changes!
Conclusion
The animation process is hopefully simple to grasp, as it is essentially recording edits and adjusting keyframes. Realistically however, an animation will contain lots of them. Try to make an expressive animation while keeping the keyframes organized!
Finale
Hopefully by now, you are familiar and comfortable with using the editor.
So, where to go from here?
To speed up rig creation and prototyping, check out PSD Rigging for automatically importing and generating rigs from .psd files.
For more advanced rigging, check out Inverse Kinematics for automated bending of multiple bones. Also works with PSDs!
Exporting
You can export your rig to be used elsewhere by clicking on File > Save or
with Ctrl/Cmd + S.
This will create an .skf file which can be used for anything that supports it.
If making a game, please see the
runtimes table for
an overview of what game engines are ready to use SkelForm.
You may read through the pygame tutorial for an overview of using your animation in a real game environment.
Using In a Game
For this section we’ll use pygame, but any of the supported engines will do provided you understand the language and basics.
This section assumes you have a basic understanding of using the command prompt and/or terminal. Engines with a graphical editor are not supported at the time of writing.
Pygame does not supoprt mesh deformation at the time of writing.
Table of Contents
Setup
Note: this is not comprehensive of all steps. Please read the provided links thoroughly.
- Ensure you have Python installed and running
- Make a folder (something like
skf_game) - Create and enter a virtual environment
- Install dependencies:
pip install pygame-ce
pip install skelform_pygame
pip install dacite
- Create a Python file (perhaps
game.py) and paste this into it:
import pygame
import skelform_pygame

pygame.init()

screen = pygame.display.set_mode((1280,720))

clock = pygame.time.Clock()
time = 0

#1 - load armature

while True:
    for event in pygame.event.get():
        if event.type == pygame.QUIT:
            pygame.quit()
            raise SystemExit
    screen.fill("black")

    #2 - get frame

    #3 - animate

    #4 - construct

    #5 - draw

    pygame.display.flip()
    clock.tick(120)
    time += clock.get_time() / 1000
Courtesy of https://www.pygame.org/docs/tut/newbieguide.html
Run the file with python game.py (or python3). If you see a black window
with pygame window at the top, then you’re all set!
Lines that look like #1 - load armature will be used to guide you along the
way.
Loading the Armature
We’ll need to load the armature to use it. skelform_pygame provides a handy
load() function for that!
Underneath #1, paste this:
file_name = "skellina.skf"
(skellina, texAtlas) = skelform_pygame.load(file_name)
Edit file_name to be the name of the .skf file that you exported.
Animating & Drawing
With the loaded armature, we can use it as much as we’d like. In fact, let’s use it now!
Before we can animate it, we must get an approriate frame. We’ll use time in
our code to get a frame based on the time.
Underneath #2, paste this:
frame = skelform_pygame.time_frame(
    time,
    skellina.animations[0],
    False,
    True
)
This will give us an appropriate frame that we can use for the first animation.
Note that we have enabled looping since the last paramter is True. The one
before it is reversing, which we don’t need.
Now we can process the armature for our first animation.
Underneath #3, paste this:
skellina.bones = skelform_pygame.animate(
    skellina,
    [skellina.animations[0]],
    [frame],
    [0] # blend frames
)
This will move all bones accordingly with the first animation. Note the last array, which are the blend frames. These are used to smoothly transition from one animation to the other. For now we’ll leave this at 0.
Underneath #4, paste this:
constructed_bones = skelform_pygame.construct(
    skellina,
    screen,
    skelform_pygame.AnimOptions(
        pygame.Vector2(screen.get_width()/2, screen.get_height()/2)
    ),
)
This will give us the final result of bones, where we can also apply modifications (eg; change the position). Here, we’ve offset all bones to the center of the screen.
Underneath #5, paste this:
skelform_pygame.draw(
    drawn_bones,
    skellina.styles,
    textureAtlas,
    screen
)
This will draw the bones on screen. Finally!
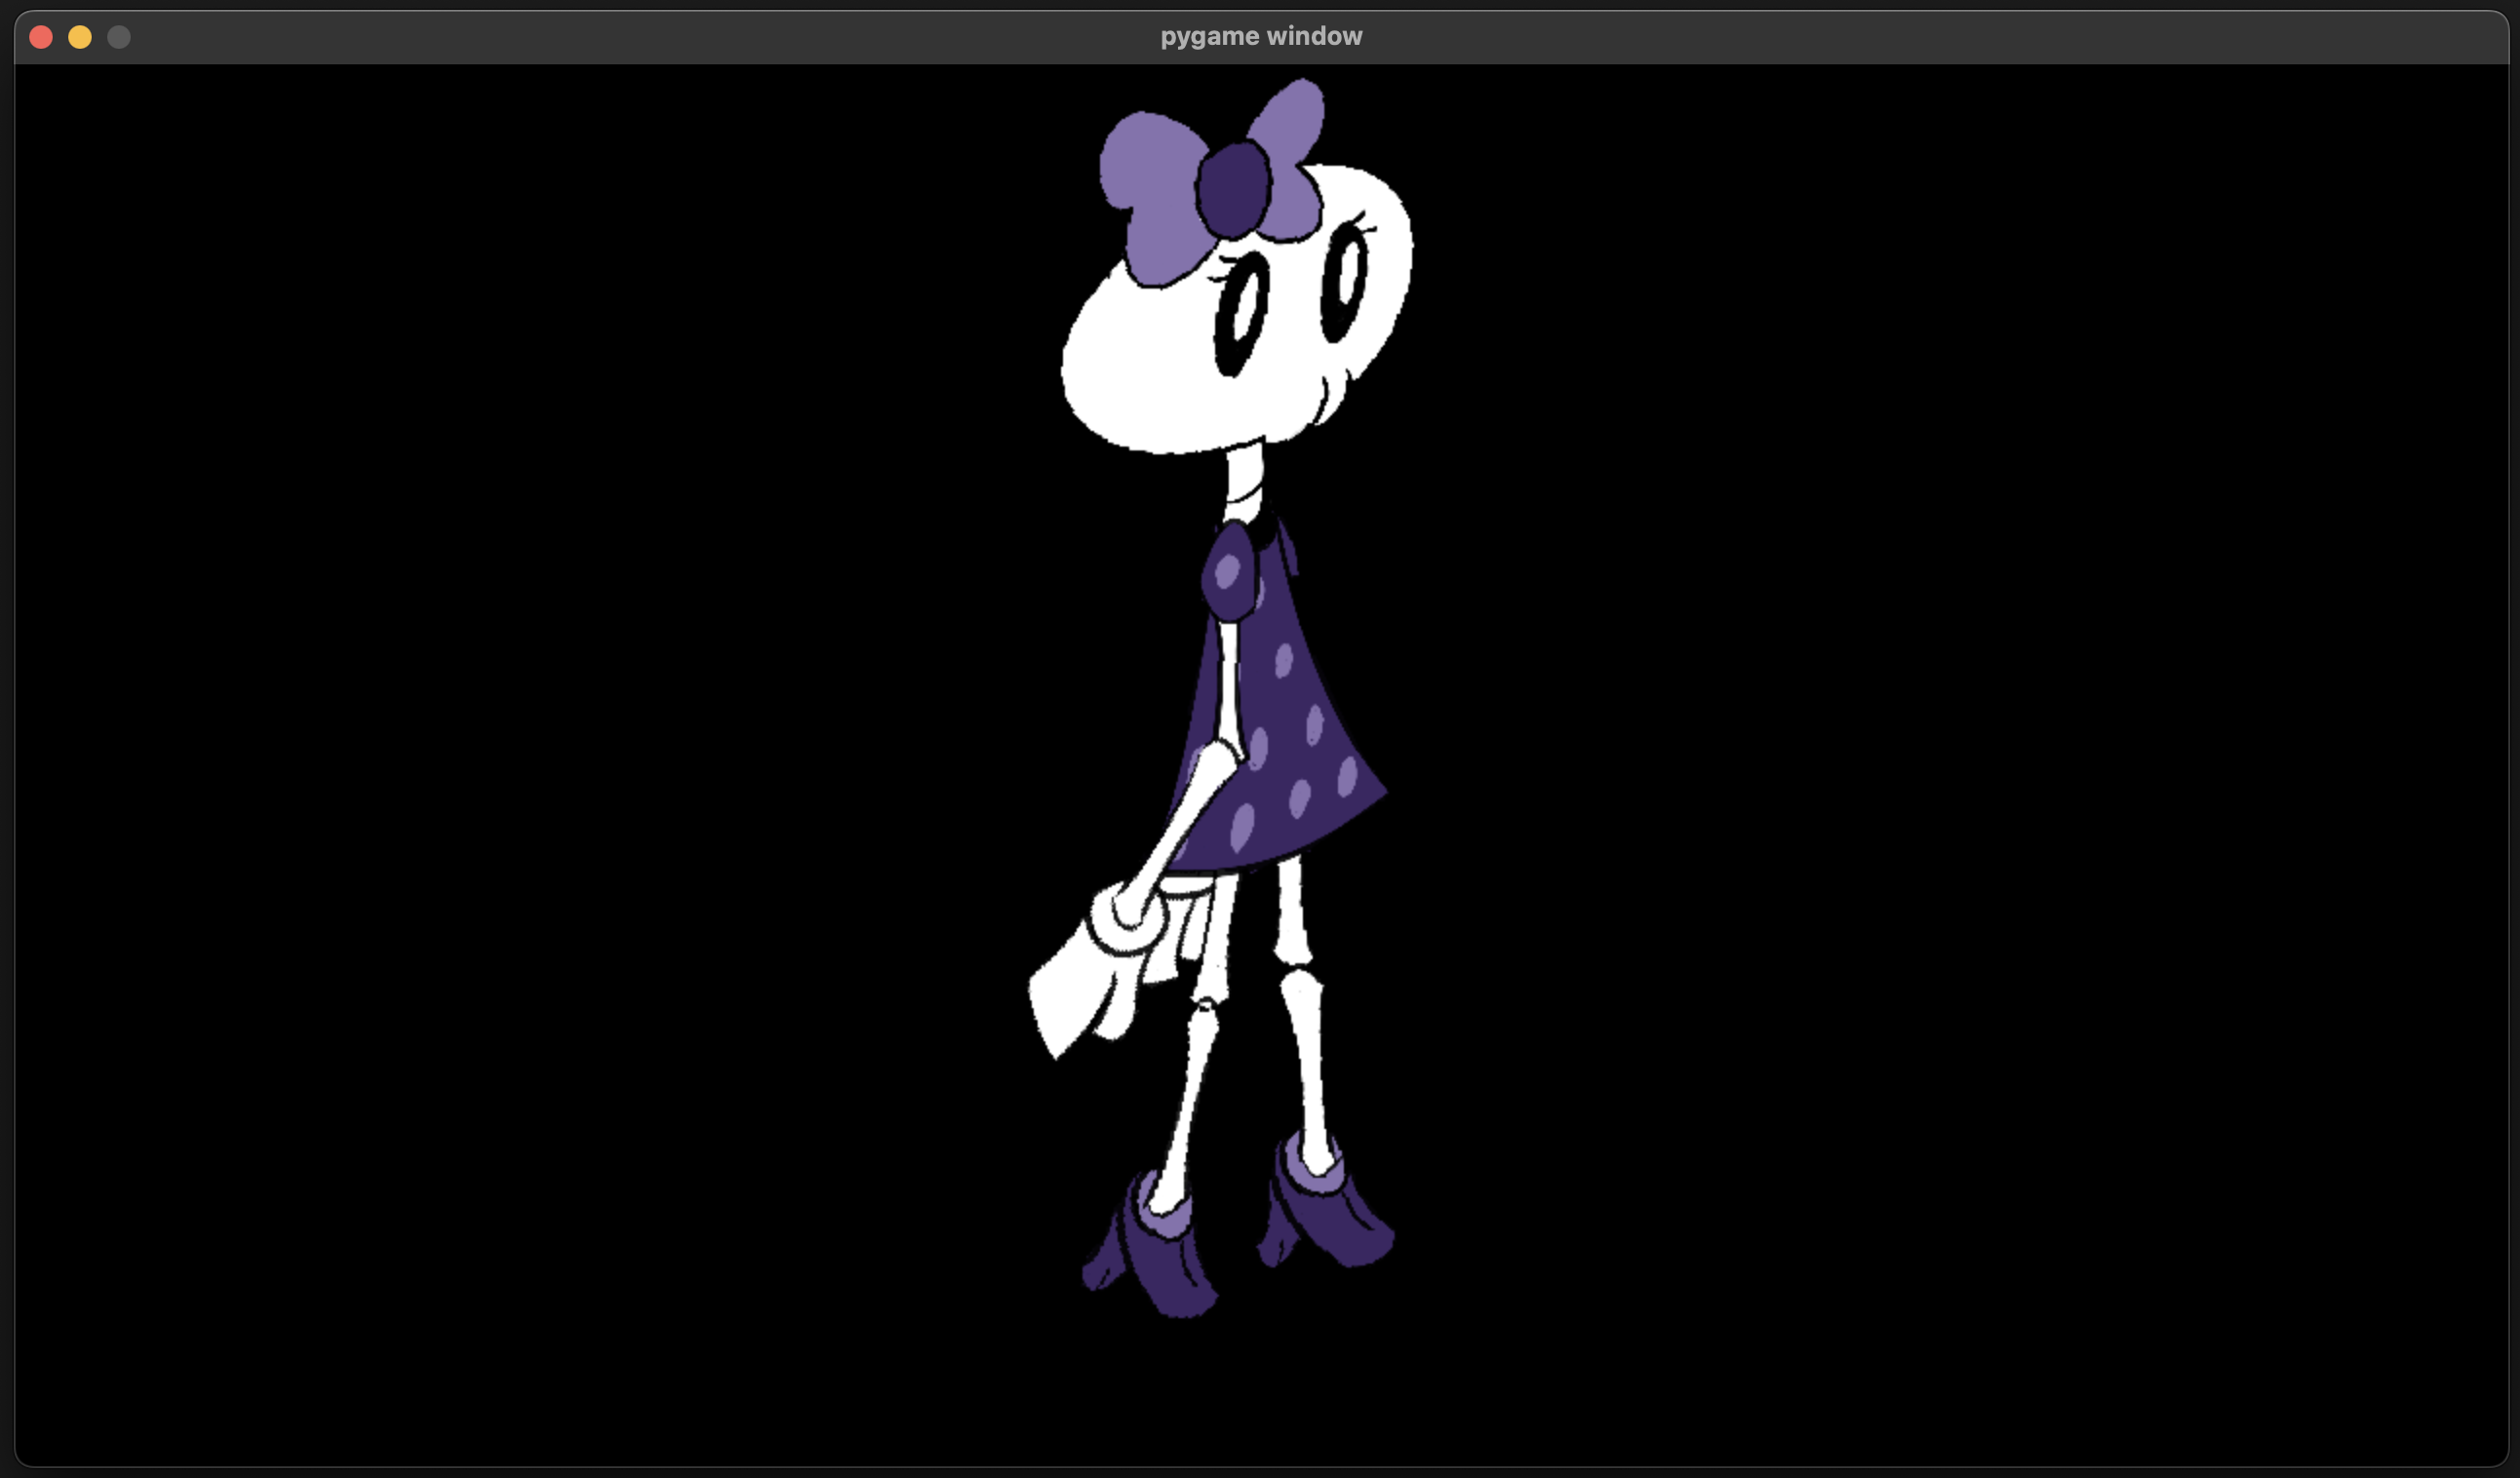
Let’s see it in action. Run the file, and you should see your armature being animated!
…and that’s it!
The armature’s position and scale can be controlled from AnimOptions in
animate(), so you can use eg; position to move it around. Try making it move
when pressing the left or right arrow keys!
Full Setup
This the final code with the above steps included:
import pygame
import skelform_pygame

pygame.init()

screen = pygame.display.set_mode((1280,720))

clock = pygame.time.Clock()
time = 0

#1 - load armature
file_name = "skellina.skf"
(skellina, texAtlas) = skelform_pygame.load(file_name)

while True:
    for event in pygame.event.get():
        if event.type == pygame.QUIT:
            pygame.quit()
            raise SystemExit
    screen.fill("black")

    #2 - get frame
    frame = skelform_pygame.time_frame(
        time,
        skellina.animations[0],
        False,
        True
    )

    #3 - animate
    skelform_pygame.animate(
        skellina,
        [skellina.animations[0]],
        [frame],
        [20]
    )

    #4. construct
    constructed_bones = skelform_pygame.construct(
        skellina,
        screen,
        skelform_pygame.AnimOptions(
            pygame.Vector2(screen.get_width()/2, screen.get_height()/2)
        ),
    )

    #4 - draw
    skelform_pygame.draw(
        constructed_bones,
        skellina.styles,
        texAtlas,
        screen
    )

    pygame.display.flip()
    clock.tick(120)
    time += clock.get_time() / 1000
PSD Rigging
SkelForm supports importing Photoshop Document (PSD) files to turn into an armature. To do this, a specific structure is needed.
Table of Contents
Sample File
A sample PSD file may be downloaded to be kept as a reference, and will automatically form a proper rig when imported in SkelForm.
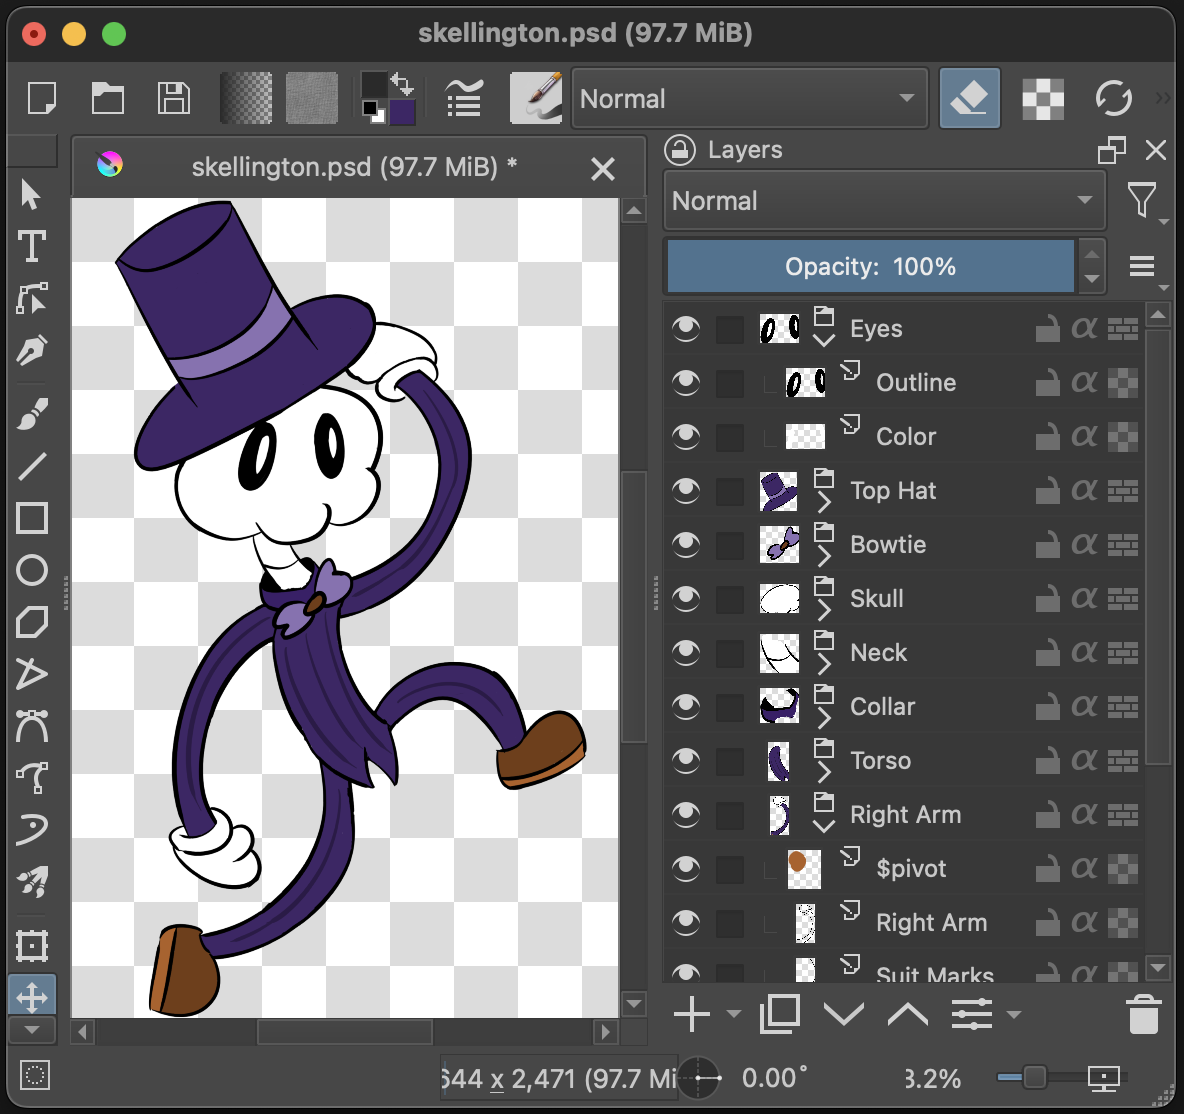
Group > Bone, Layer(s) > Texture
Bones are made out of groups, and all layers of a group will be merged to form it’s texture:
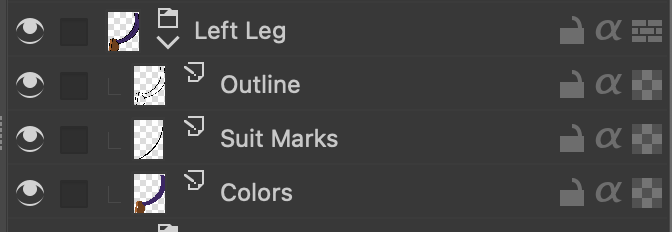
Child Bones
Groups in groups will be children, however they must be first in the hierarchy. Groups after a layer will be ignored.
Pivots
By default, bones created from groups will not have a dedicated pivot parent, and will be centered.
To add a dedicated pivot, create a layer specifically named $pivot, and make it a child of the group in question. The pivot’s position will be based on the top-left corner of the layer:
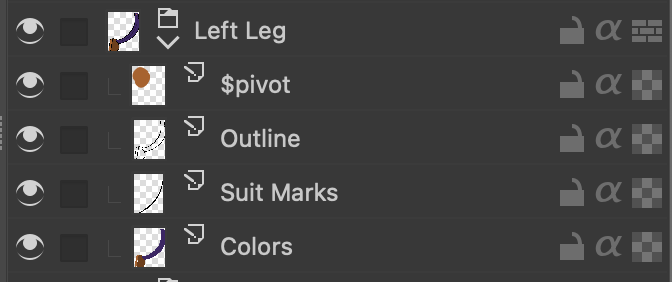
Although this layer will be invisible in the rig, you may need to draw on it to be able to position it in your art program.
When importing the PSD, that group should now be comprised of 2 bones: the main bone (pivot), and the texture. From here on out, it is recommended to only edit the main bone.
Inverse Kinematics
See: Inverse Kinematics
Layers starting with $ik_ will be used to set IK properties to their
respective bones.
Family id format: $ik_X
Examples:
-
$ik_0 -
$ik_1
Constraints:
-
$ik_clockwise -
$ik_counterclockwise
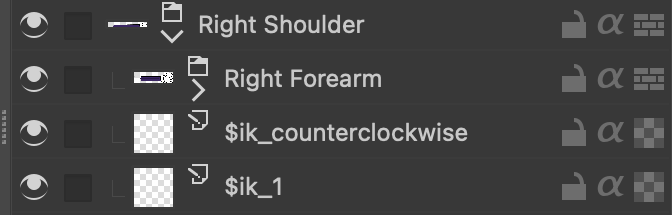
Once imported, a target bone will be automatically generated and assigned.
Runtime API
This section will only acknowledge runtimes included in the Engine Runtimes Table. Others may be used, but could have a different API that is not supported.
For developing runtimes, please see the Developer Documentation.
Functions
Load()
(root, texture) = Load("skellington.skf")
Loads the SkelForm file that is provided.
Returns the root (containing the armature, among other data) and texture.
FormatFrame()
frame: int = FormatFrame(20, armature.animations[0], false, true)
A helper function to format the provided number into a usable frame for the animation, with options like reversing or looping.
If first animation has 14 frames, frame will be 6 (since loop is true).
frame will be used later for animate().
TimeFrame()
frame: int = TimeFrame(time.duration(), armature.animations[0], false, true)
A helper function to format the provided time into a usable frame for the
animation, with the same options as formatFrame().
Assuming:
time.Duration()is 0.5s- Animation is 60 FPS
- Animation is 60 frames long
frame will be 30.
Animate()
animOptions = {
  blendFrames: [20]
}

drawnBones = Animate(armature, [armature.animations[0]], [frame], animOptions)
Takes the armature, as well as the animation(s) and frame(s). The bones in the armature are then processed accordingly.
Returns a new set of bones to be later drawn via draw().
Additional options may be given such as speed, transform modifiers, and blending (per animation).
Blending will ‘blend’ animations transforms. This is great for eg; smooth animation transitions.
Draw()
Draw(drawnBones, armature.styles, texture)
Draw the provided bones on-screen.
The bones provided must be from animate(). It cannot be
the armature’s bones directly.
The ??? parameter is engine-dependent, but usually just requires passing the
renderer.
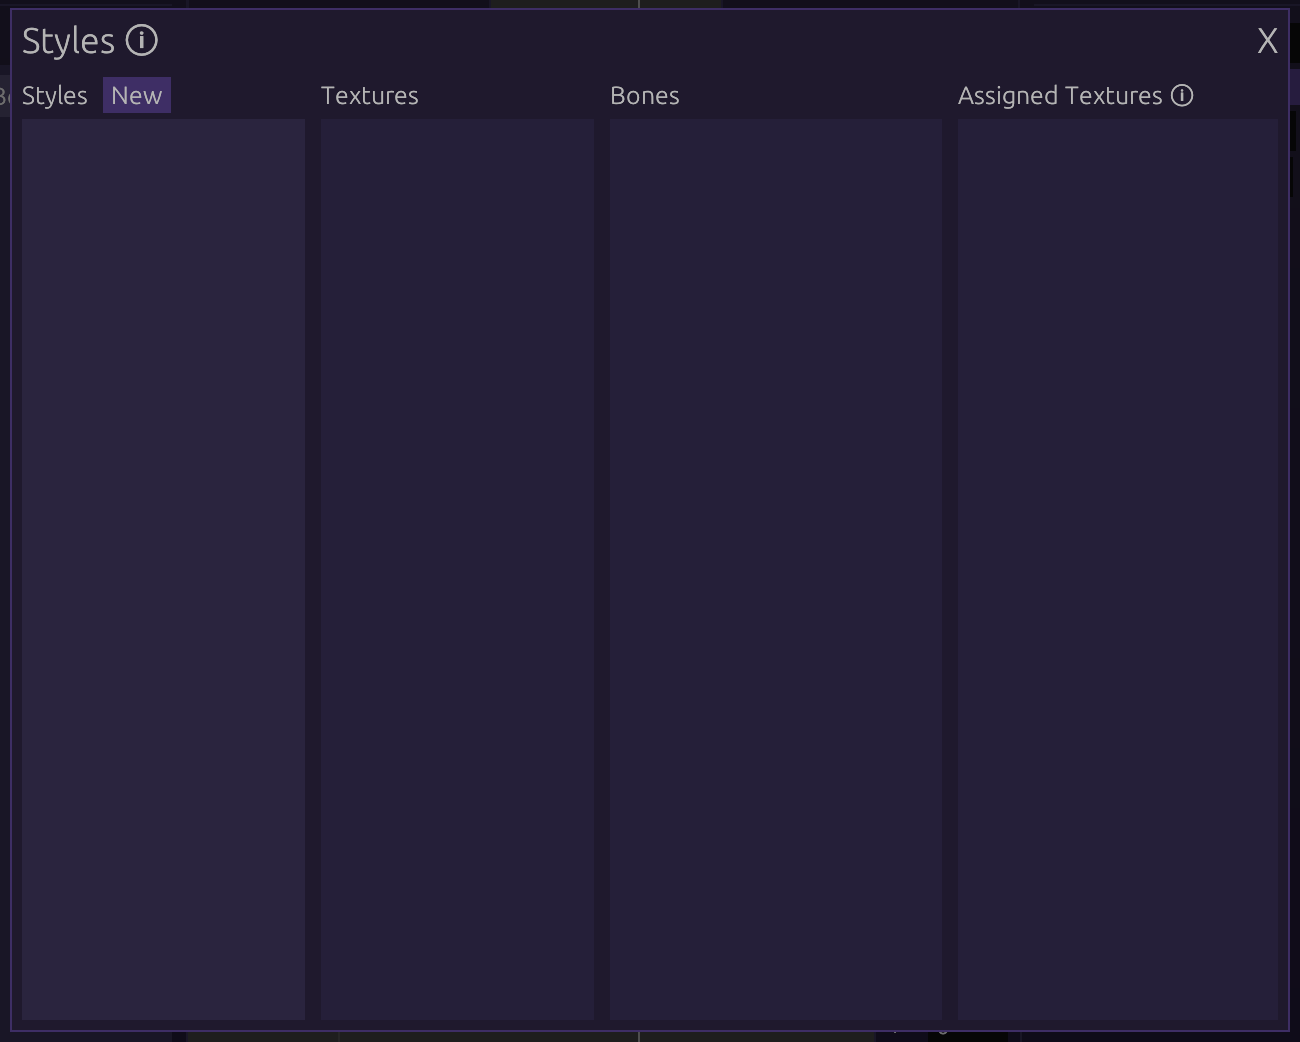
Styles
Styles are groups of textures, and can be used to create skins and/or outfits.
One or multiple styles may be assigned to bones, which will use the corresponding texture based on index.
Styles can be accessed via the dropdown next to the New Bone button in the
Armature panel, or on a particular bone in the Bone panel (next to
Styles:). Clicking [Setup] will open the styles modal.
Table of Contents
Styles Modal
The Styles modal can be opened via the [Setup] option in styles dropdowns, and
comprises 3 sections:

Styles Section
Lists all available styles, as well as their visibility.
Click on New to create a new style and give it a name.
This section will display details of a hovered texture in the textures section.
Textures Section
Bones with the same name as the texture will automatically use it, assuming style priority.
Textures can be renamed by double clicking.
If a different style is hovered in the Style section, this list will instead show all textures in it.
Bones Section
Simply lists bones. Helps with the section to the right (assigned textures).
Dragging a texture on a bone will set it as the bone’s texture.
Assigned Textures Section
Lists the assigned textures of the corresponding bone to the left.
Clicking on them will open a dropdown to select a texture from the chosen style.
Style Visibility
Styles can be made visible/hidden via the dropdown in the Armature panel, or in the styles modal.
Bones will ignore hidden styles, and will be untextured if it’s the only one they have.

Style Priority
Bones will always use the texture of the same name in the first active style in the list.
The order of styles can be changed by dragging them.
Inverse Kinematics
Armatures with limbs (shoulders, legs, etc) can use inverse kinematics to automatically adjust themselves, rather than needing manual treatment.
This can greatly speed up animation workflows, as limbs will only need a single bone as a point of reference. It can also enable procedural/dynamic animations in games.
Note: For the rest of this section, inverse kinematics will be referred to as IK.
Table of Contents
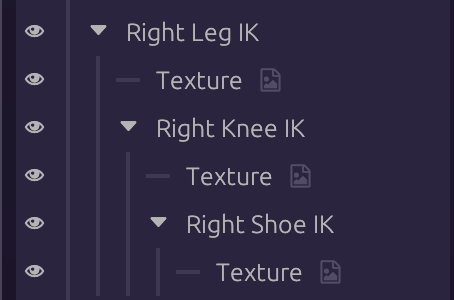
Hierarchy Setup
Bones must be ordered such that each connecting joint will be the child of the other. There can be as many children within a bone, but only one of them can be connected via IK.
Families and Indexes
Select any bone to be part of IK, and click New in the Family Index dropdown
in the Bone panel:
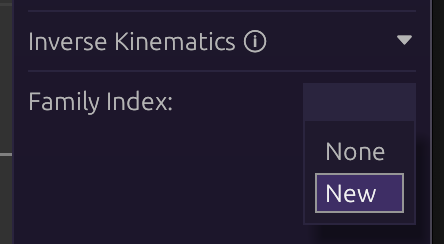
This will create a new family (group) of joints, along with other options. Assign other bones to be part of the same family with the same index.
In the image below, bones with IK in their name are all set to the same family index (0):
Target Bone
IK families need a bone to ‘target’, which will be their point of reference. Without it, they won’t move.
- Create a new bone
- Select the first bone in an IK family
- Click the target button next to
Target: - Select the new bone
The family will now follow, or point to, the target bone.
Constraints
By default, IK families will bend however they can to reach their target. This could be undesirable for eg; shoulders or legs, which should only bend one way.
Clicking on the first bone of an IK family will show the Constraint: option:
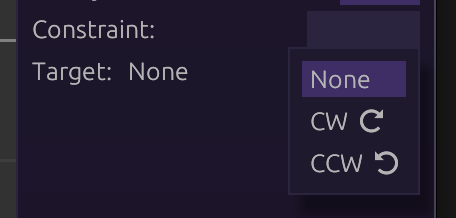
The names come from the directions represented by the arrows. In practice it’s not required to know which to use in advance. Simply test both to find what’s appropriate.
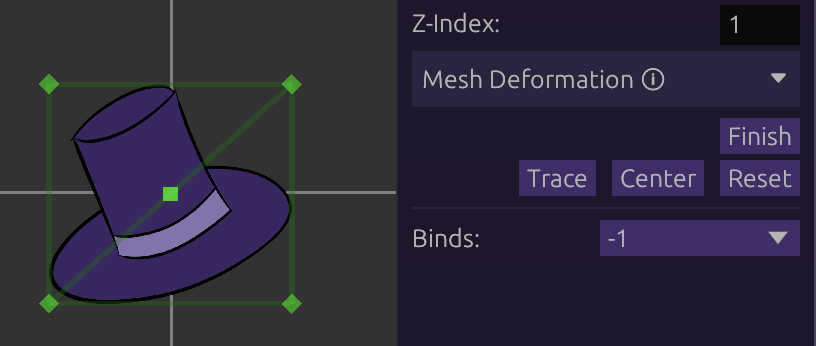
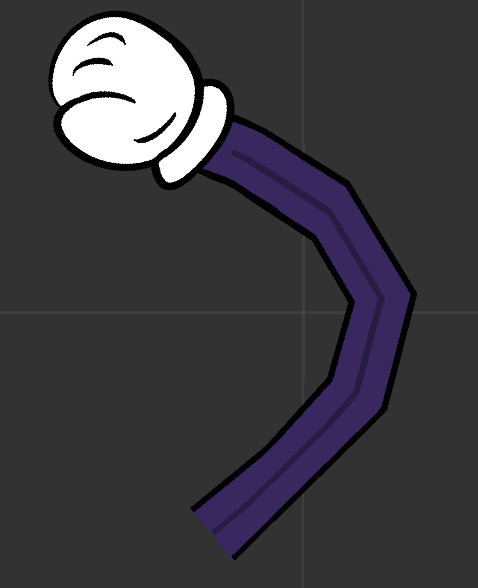
Mesh Deformation
Textures can be turned into meshes that can be warped flexibly, using vertices and binds.
Table of Contents
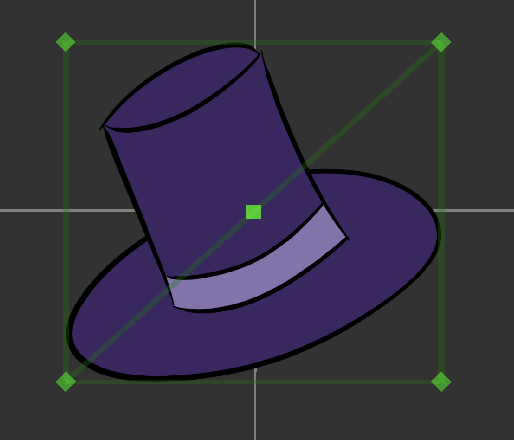
Vertices
All textures start off with 4 vertices, forming its full rectangle.
Clicking ‘Edit Vertices’ will show the vertices and lines.
Dragging Vertices
Vertices, as well as the lines and triangles formed by them, can be dragged around to be moved.
Dragging a line or triangle will move the 2 or 3 vertices that it connects to, respectively.
Adding Vertices
While hovering anywhere on a mesh, left-clicking will create a vertex in that place.
This will reconstruct the triangles to form the mesh with the new vertex.
Deleting Vertices/Triangles
Right clicking on a vertex will delete it, and reconstruct the triangles.
A triangle can also be deleted with a right-click. This will not delete any vertices, only the triangle. This can be used to remove excess triangles in cases of over-zealous triangle construction.
Tracing
While editing vertices, clicking Trace will automatically generate a cutout of
vertices around the texture.

This often requires cleanup of the vertices.
Note: tracing is not intended to work on textures with ‘holes’ in them.
Binds
Vertices can be bound to other bones to be followed around and inherit their properties (scale, rotation, etc).
This is the only way to animate vertices individually, as they cannot be recorded on their own.
Creating Binds
Clicking [New] in the binds dropdown will create a new bind.
Click Set Bone and the bone in question to be set as the bind.
Binding Vertices
Double-click on a vertex to bind it. Double-click again to unbind it.
When bound, vertices will follow the bone around based on its weight scale and pathing behavior (if enabled).
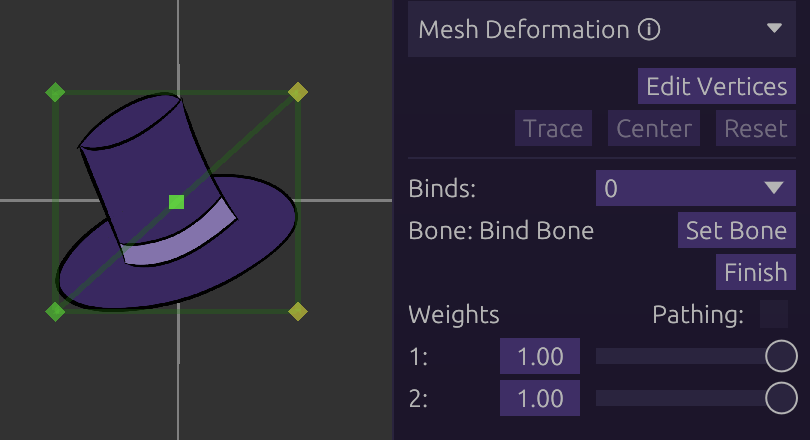
Weights
Each vertex in a bind has a ‘weight’ scale, ranging from 0 to 1. This determines how strongly the vertex is inheriting the bone.
Example: A weight of 0.5 will cause the vertex in question to inherit only ‘half’ the amount of its bone.
Pathing
Enabled by ticking the Pathing checkbox.
Instead of inheriting the bone directly, vertices can be set to follow along an imaginary path formed by its bind(s).
Under pathing, weights will determine how far away the vertex is from the bind.
0 will snap the vertex directly on the bind.
Use cases:
- Tube-like or pipe-like structures
- Rubberhose-style limbs (see Skellington sample in-editor)
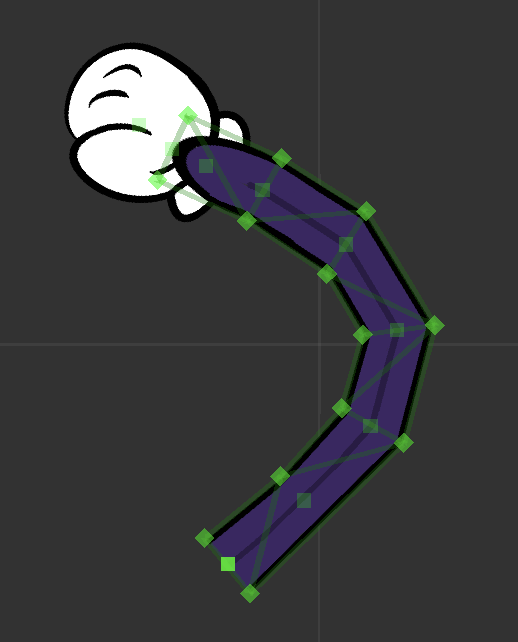
Notice the bind bones (translucent squares) between vertex pairs
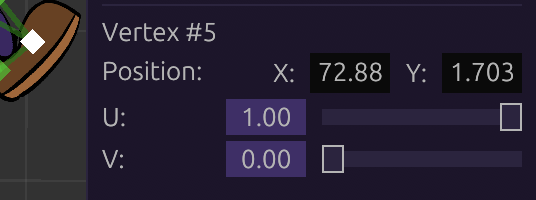
Editing UVs
The UV of any vertex can be edited by left-clicking it, and editing the UV sliders that appear on the right panel:
Importing SWF
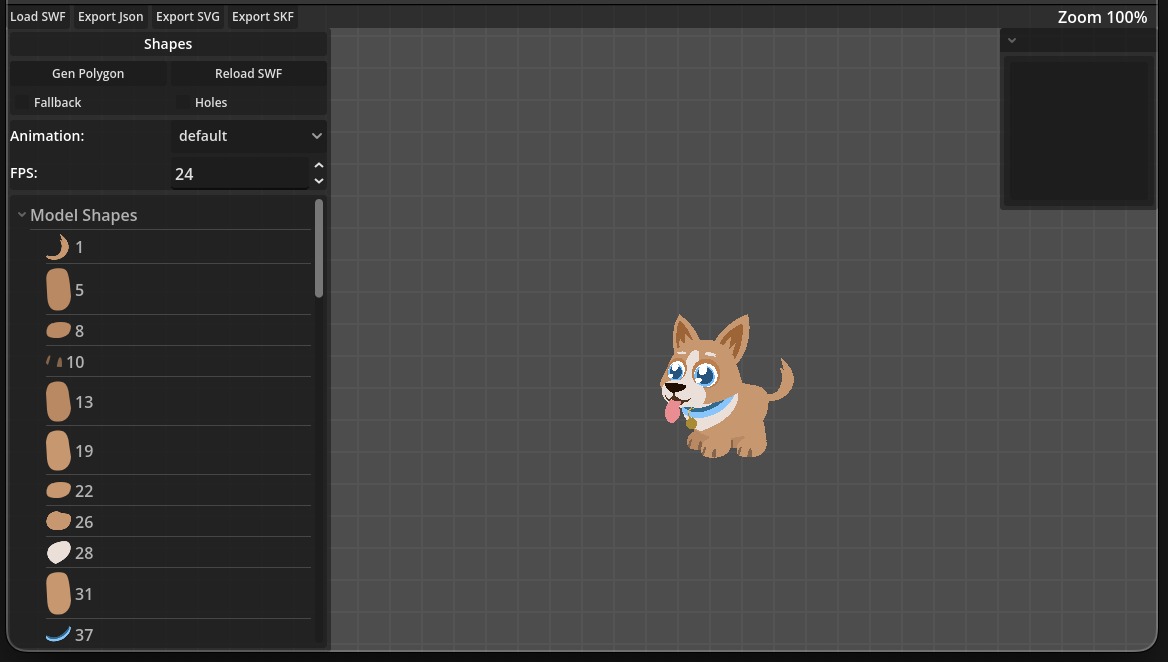
SkelForm does not directly support importing SWF (Shockwave Flash) files.
Instead, you will be guided with using GD-SWF which has support for exporting to SkelForm.
Installs are available in GD-SWF’s Github Releases.
Basics
1. Load the SWF with ‘Load SWF’ at the top left:
The SWF and its rig should be displayed:
2. Create a working .skf version with ‘Export SKF’ at the top left:
Done! You may open the new .skf file in SkelForm:
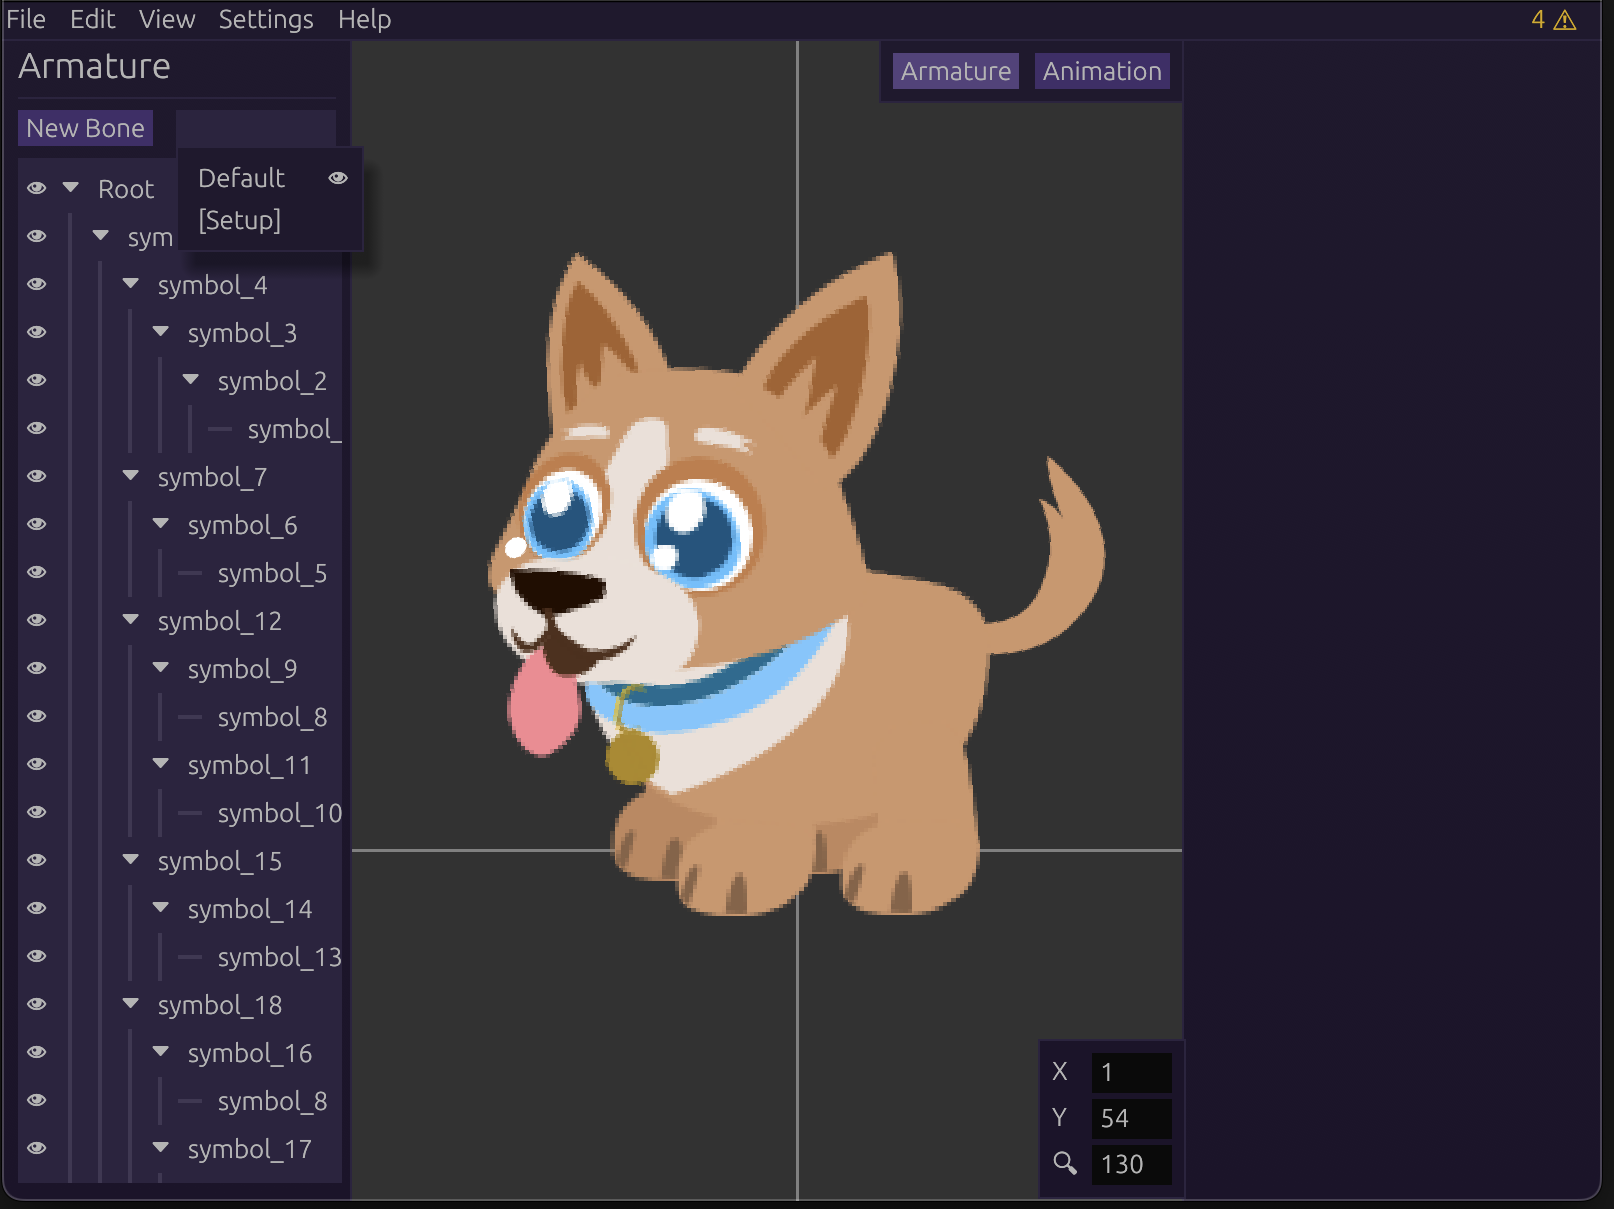
If no textures appear, check if any styles are active.