Inverse Kinematics
Armatures with limbs (shoulders, legs, etc) can use inverse kinematics to automatically adjust themselves, rather than needing manual treatment.
This can greatly speed up animation workflows, as limbs will only need a single bone as a point of reference. It can also enable procedural/dynamic animations in games.
Note: For the rest of this section, inverse kinematics will be referred to as IK.
Table of Contents
Hierarchy Setup
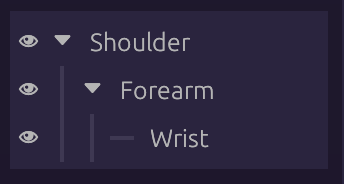
Bones must be ordered such that each connecting joint will be the child of the other. There can be as many children within a bone, but only one of them can be connected via IK.
Families and Indexes
Select any bone to be part of IK, and click New in the Family Index dropdown
in the Bone panel:
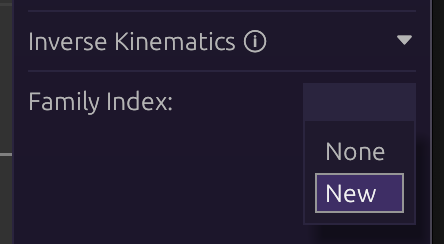
This will create a new family (group) of joints, along with other options. Assign other bones to be part of the same family with the same index.
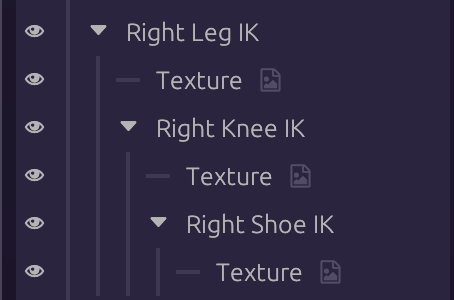
In the image below, bones with IK in their name are all set to the same family index (0):
Target Bone
IK families need a bone to ‘target’, which will be their point of reference. Without it, they won’t move.
- Create a new bone
- Select the first bone in an IK family
- Click the target button next to
Target: - Select the new bone
The family will now follow, or point to, the target bone.
Constraints
By default, IK families will bend however they can to reach their target. This could be undesirable for eg; shoulders or legs, which should only bend one way.
Clicking on the first bone of an IK family will show the Constraint: option:
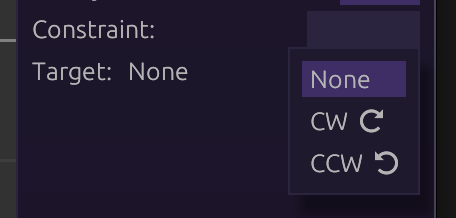
The names come from the directions represented by the arrows. In practice it’s not required to know which to use in advance. Simply test both to find what’s appropriate.